Creating, Configuring, and Archiving Policies
This article is the full reference for creating, configuring, locking/unlocking, and archiving policies.
Creating Policies
Click + New Policy in the top right hand corner.
Name your policy and select the Scope in the drop down
Select the touch point from the next drop down menu
Set the conditions and actions for the policy
Click Publish Policy to finalize your policy
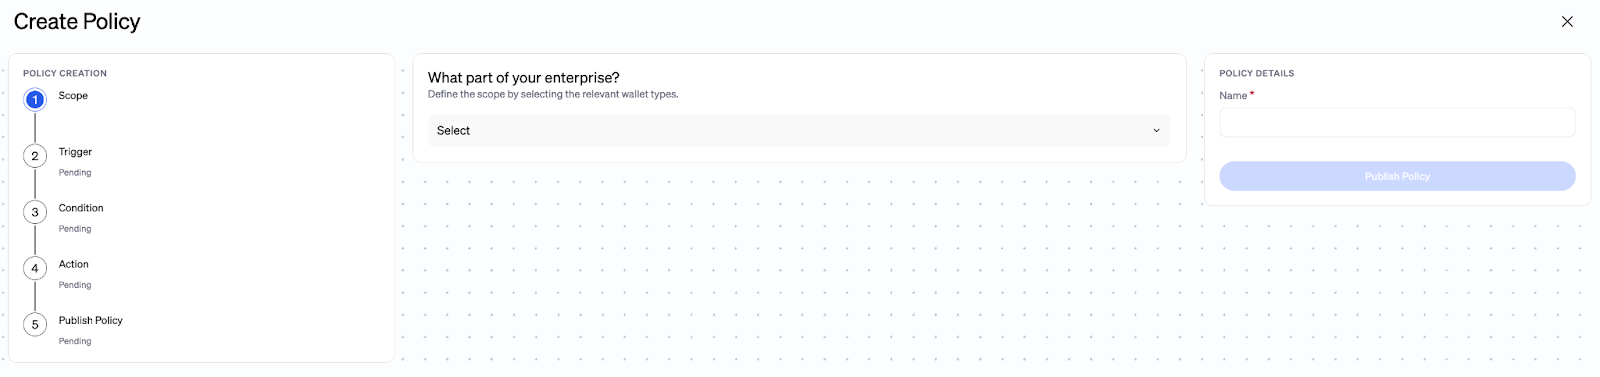
Any transaction that violates an account-level policy is automatically denied (unlike wallet-level policies, which are then sent for admin approval). Note: more restrictive policies may be set at the individual wallet level if you’d like.
Configuring Policies
Once you begin setting a policy for a wallet, you have 48 hours to make changes and set up remaining policies if desired. After the 48 hour window, your policy is locked and you must contact support@bitgo.com to add or change any policy.
During request, you must specify for how long you need your policy to remain unlocked (e.g., 48 hours). During this period, you can make any changes to the policy. Once the time period ends, the policy automatically locks again.
This is for security purposes so that, if the wallet is compromised, an attacker cannot change the policies and remove your restrictions.
Three important notes about policy locking:
Locking and unlocking happens at the individual policy level - not all policies. E.g., you have 10 unique policies, when you request to unlock 1 of them, the other 9 remain locked and uneditable.
Once the policy is unlocked, you must make all necessary changes and ensure you submit the changes for approval. The policy can lock again, while the approvals are pending.
When a policy is unlocked, any user with the appropriate permissions can modify the policy. Once the changes are submitted, they’re locked and no other user, regardless of having their permissions, can attempt to change this policy. I.e., only one in-progress change can occur at a time
Viewing Policy Statuses
To view the status of your policies, navigate to the Policies tab. Each policy displays a Status on the right-hand side, which will be one of the following:
Active
Pending Approval
Archived
Creating and Changing Account-level Policies:
To create a new or modify an existing account-level policy, if the account has more than one owner, then the changes must be approved by at least one owner before taking effect.
For your security, account-level policies are locked 48 hours after they are set. Once the policy locks, you will need to contact BitGo support to request an unlock to further edit or archive the locked policy.
If a wallet policy differs from an enterprise policy, then the more restrictive policy takes precedence. For example, if the spending limits are lower for a wallet than for the entire enterprise, then that wallet uses the lower limits.
Policy Controls
Policy Controls allow you to easily configure how policy unlocks and updates are reviewed and approved within your enterprise. To access Policy Controls, navigate to Security > Policies and click the Controls button in the top-right corner.
Managing Control Types
There are two Policy Control options:
Policy Unlock Control — Defines the approval requirements for unlocking a policy (i.e. the actions required before a policy can be unlocked or modified).
E.g: Requires 1 Liveness Verification from User Role to approve control
Policy Update Control — Defines the approval requirements for approving changes to a policy (i.e. the actions required before an edited policy is approved).
E.g: Requires approval from User Role + 1 Approval from User Role to approve control
Once unlocked, you can:
View Control Details — Review the current approval requirements for both Policy Unlock and Policy Update Controls.
Edit Control Requirements — Update the actions required to unlock a policy or approve a policy update.
Confirm Changes — Once your changes are made, confirm to apply the new requirements. The updated controls will take effect immediately.
Duplicating Policies Across Multiple Enterprises
If your Organization contains multiple enterprises, you can duplicate one or more policies across them — no need to rebuild from scratch.
To duplicate a policy, go to the main Policies page and follow these steps:
Select the policy you want to duplicate.
Click the Ellipsis Menu (⋯) to the right of the policy and select Copy To — a panel will appear listing all enterprises in your Organization.
To bulk duplicate policies, select multiple policies and the Copy To option will appear in the bulk action menu at the bottom of the page, allowing you to apply the action to all selected policies at once.
Select the destination enterprise(s) and confirm. A summary of the duplication details will be displayed.
The duplicated policy is automatically submitted for approval by the admins of the destination enterprise.
Archiving Policies
If you no longer need a policy, you can archive it. Do this by:
Selecting the policy you would like to archive
Unlock the policy
Select Archive
You can access this history in the Activity log tab.
Was this article helpful?
That’s Great!
Thank you for your feedback
Sorry! We couldn't be helpful
Thank you for your feedback
Feedback sent
We appreciate your effort and will try to fix the article