Scheduling Reports Overview
This article explains the process of scheduling the generation of CSV or PDF reports for transactions, balances, trading, staking, and more.
Scheduled Reports
Schedule a report to generate and deliver automatically on a recurring basis, instead of requesting it on demand each time.
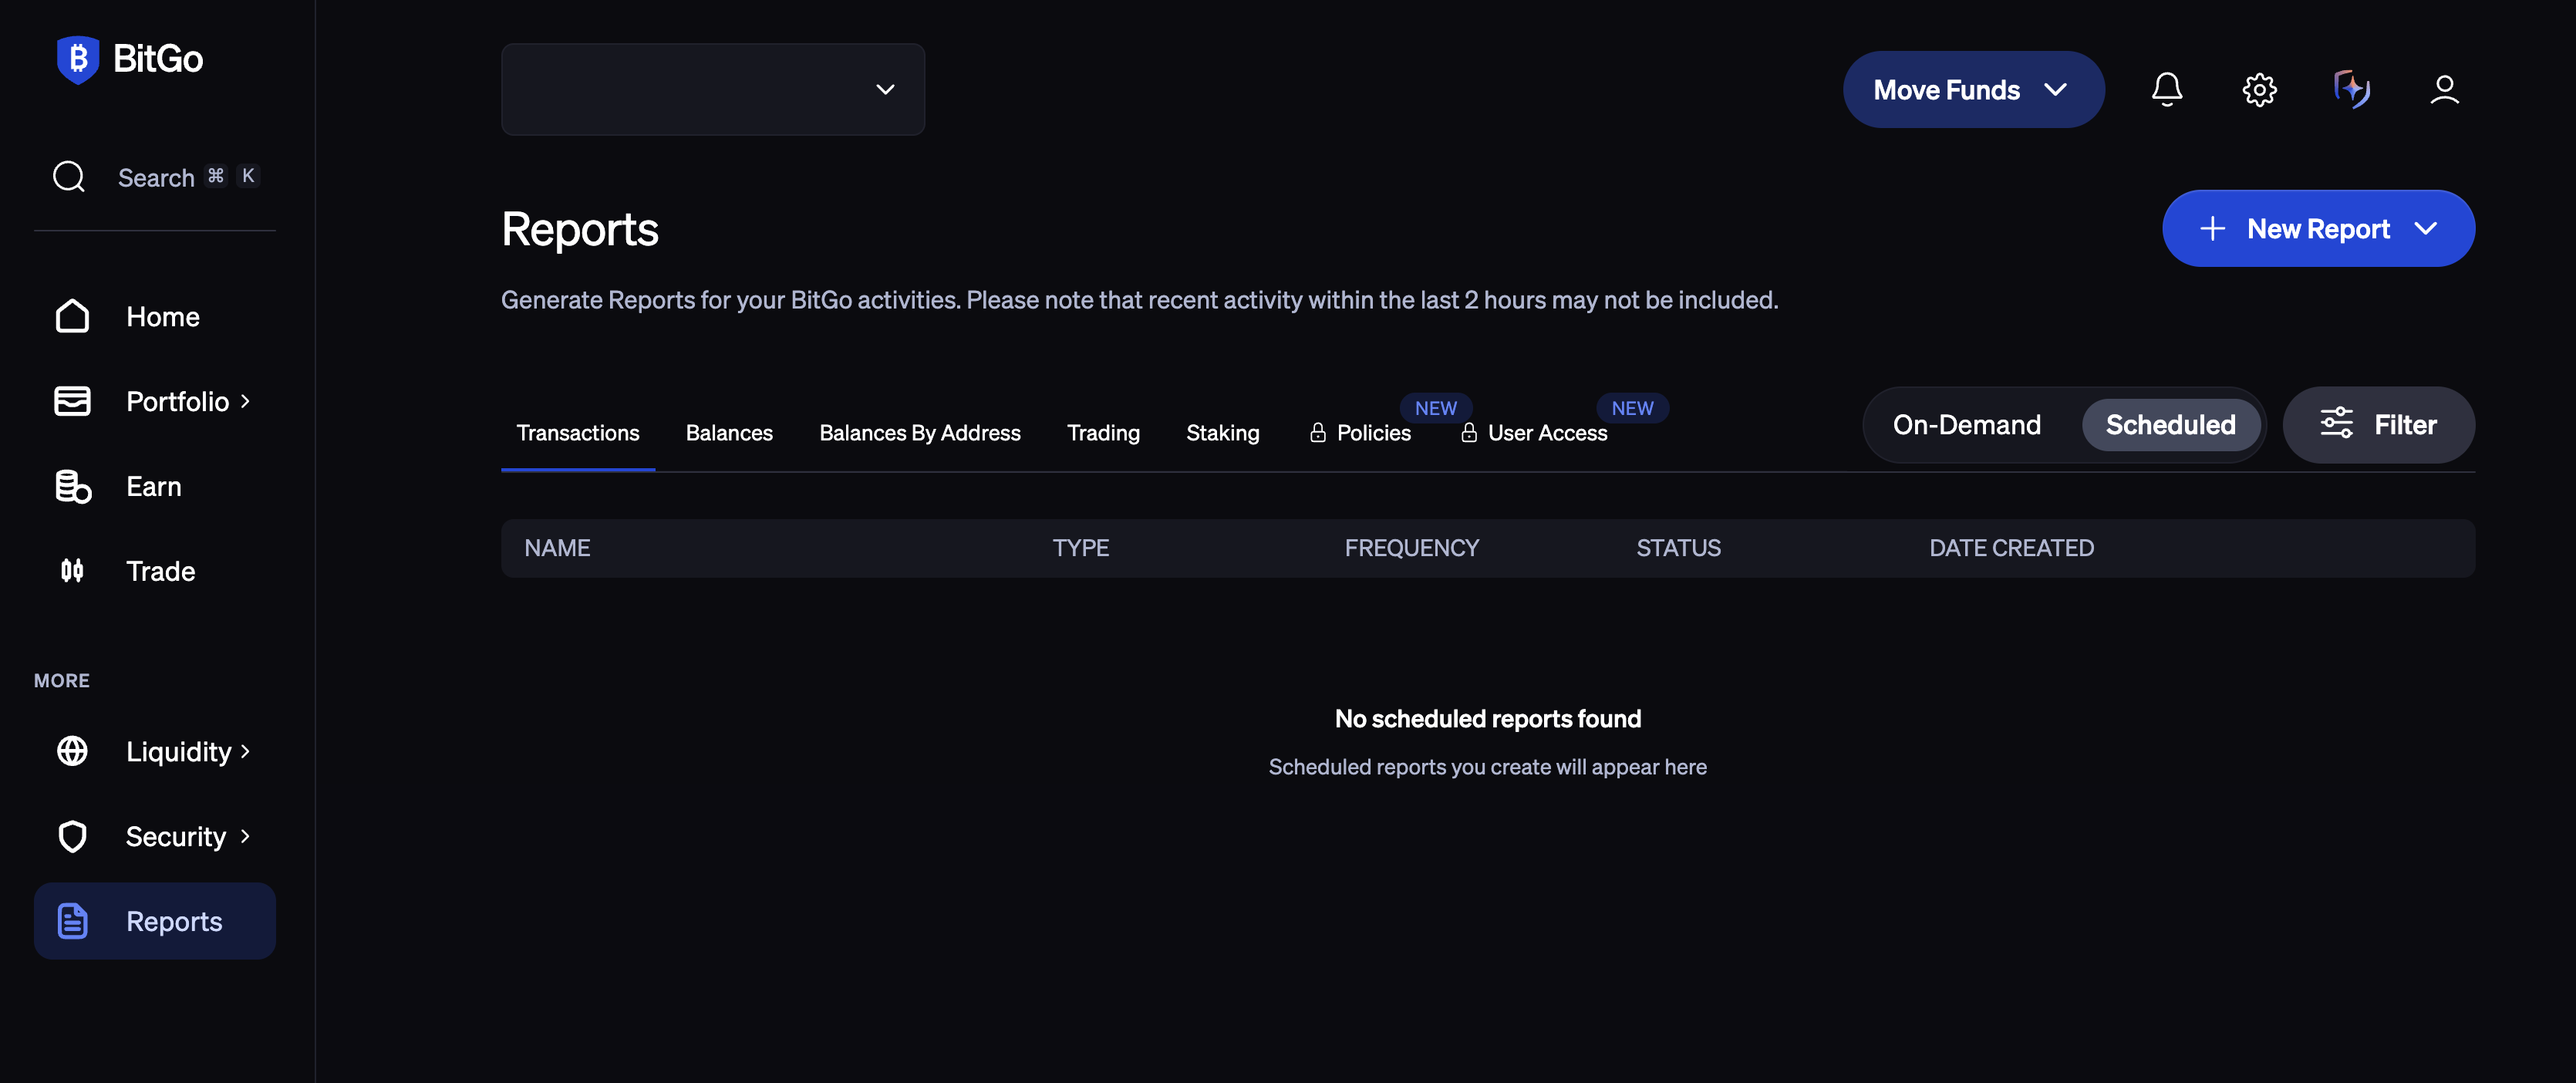
From the Reports page, click New Report and select Scheduled Reports (choose On-Demand instead to generate a one-time report).
Scheduled reports are available for the same categories as on-demand reports based on whichever tab is active when you start, such as: Transactions, Balances, Trading, and Staking
Customizing Scheduled Reports
There are several options which can be configured when setting up a scheduled report.
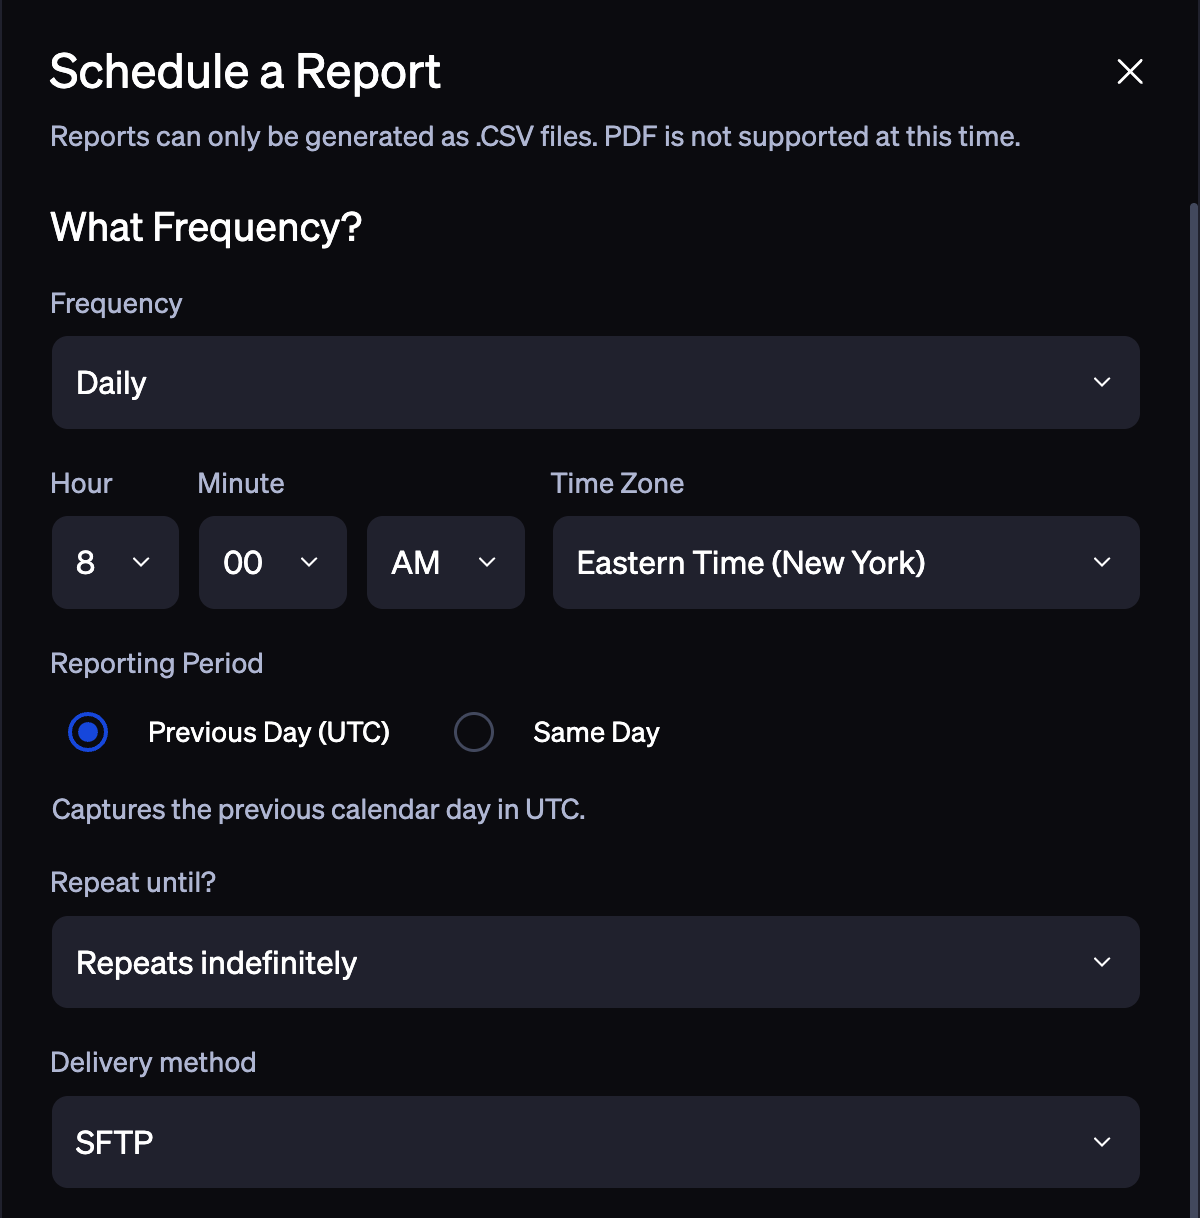
1. What Frequency?
Set how often the report should run:
Daily – runs every day at the hour, minute, and time zone you choose.
Weekly – choose a day of the week (Monday through Sunday) plus a time.
Monthly – choose a day of the month plus a time.
2. Reporting Period
Previous Day (UTC): Captures the previous calendar day in UTC
Same Day: Each delivery uses a rolling window that ends at the selected delivery time minus 2 hours (data sync lag), in the chosen timezone; not a fixed UTC calendar day.
3. Repeat until End Date
Repeats indefinitely: Default option, schedule will never stop
End date:
Schedule expire on: Accepts a date post which schedule will expire.
4. Delivery method
Choose how the report file should reach recipients:
Email – enter one or more recipient addresses. Currently only emails that are members of enterprise can receive the delivery, it will not allow scheduling for emails that are not part of enterprise.
- SFTP – enter the Host, Username, and Password, plus the optional Port (defaults to 22), Directory path, and a PGP public key if the file should be encrypted before delivery.
Click Schedule Report to save it.
The new schedule appears on the Reports page under the Scheduled tab, alongside its frequency, status, and next run time.
- For daily schedules, coverage follows the Reporting Period option you selected above. Your first delivery is the next occurrence of the time you selected.
- For weekly schedules, each report file covers the prior 7 full UTC days.
- For monthly schedules, each file covers the previous calendar month if set to run on the 1st, or the prior 30 days otherwise.
Receiving Your Scheduled Report
When a scheduled report runs, the recipient will receive an email notifying them the report is ready for download. The report will need to be downloaded prior to the expiration date or it will need to be schedule to rerun using the same method initially used to schedule the report.
The email will contain the following details:
- Report Type
- File Name
- Enterprise Name
- Expiration date
- Download Report hyperlink
Managing a Scheduled Report
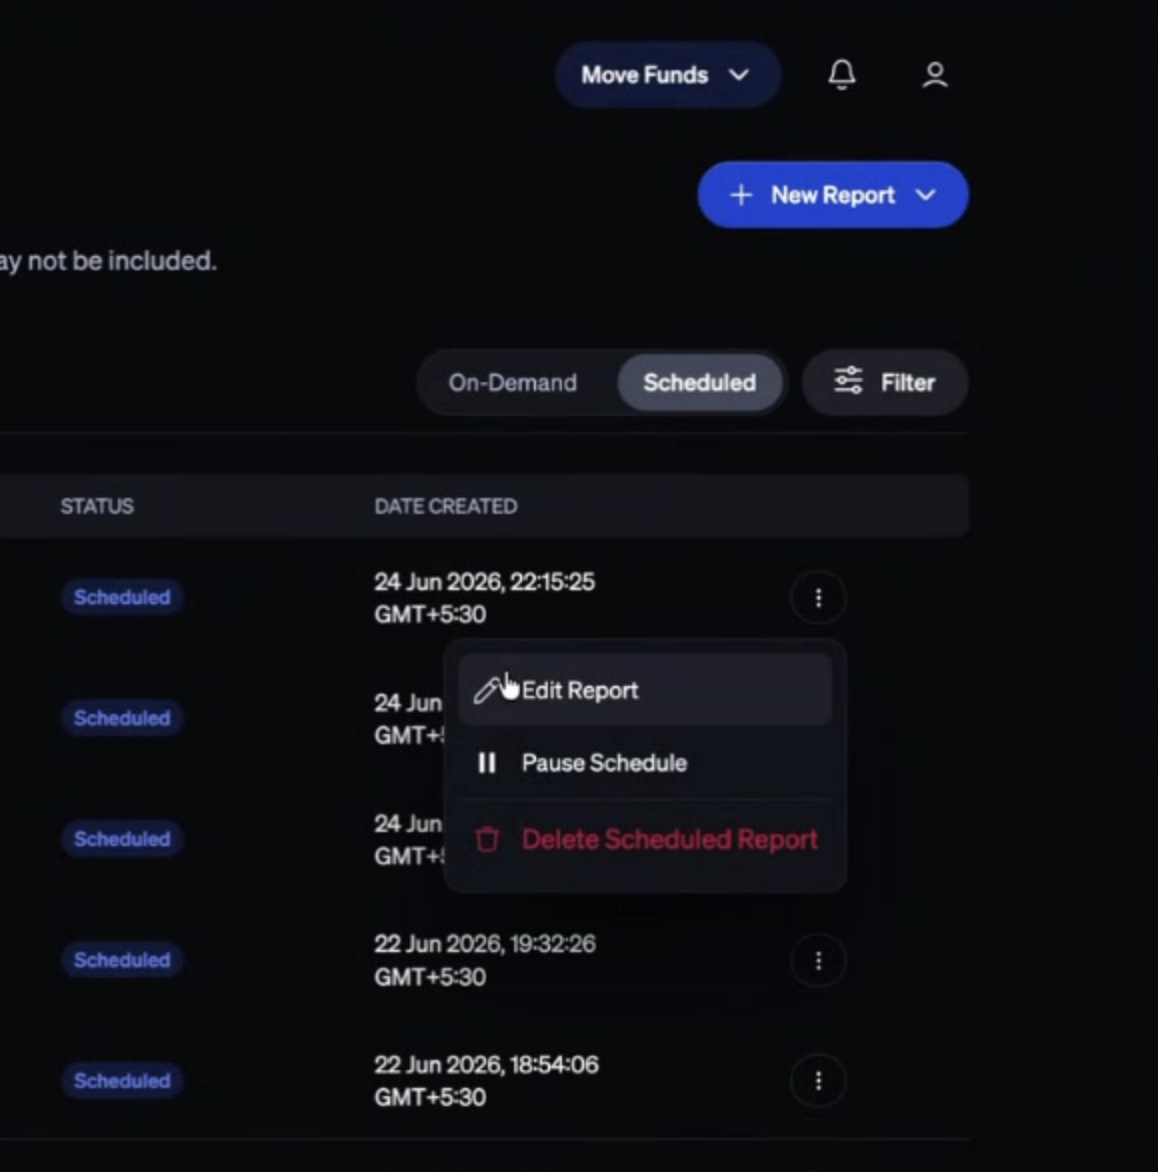
From the Scheduled tab, click the ellipses menu next to any report to Edit Report, Pause Schedule, or Delete Scheduled Report.
Editing a scheduled report reopens the same configuration panel, pre-filled with its current settings. Be sure to confirm changes before updating a scheduled report.
Was this article helpful?
That’s Great!
Thank you for your feedback
Sorry! We couldn't be helpful
Thank you for your feedback
Feedback sent
We appreciate your effort and will try to fix the article